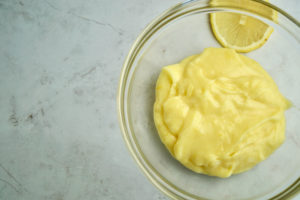
Lemon Curd

Lemon Curd
This recipe Makes 2 cups of Lemon Curd
Prep Time: 10 minutes
Cook Time: 7-10 minutes
Inactive Time: 4 hours
Ingredients:
Lemon Curd
1 cup granulated sugar
3 eggs + 1 egg yolk
½ cup fresh lemon juice
4 tbsp. unsalted room temperature butter
3 tbsp. lemon zest
½ tsp. vanilla extract
¼ tsp. Salt
Whipped Cream
1 cup heavy cream
¼ cup powdered sugar
½ tsp. vanilla extract
Directions:
You can use a double broiler to make this, but if you do not have one like me you can use a heavy saucepan and a heat safe bowl. It is important that the boiling water does not touch the bottom of the bowl. You want to steam the bowl so that it heats up slowly. This process will slowly cook the eggs in the curd with steam. Slowly cooking the eggs will prevent the eggs from scrambling.
Start by boiling 2-3 inches of water in the pot. In a heat safe bowl mix together the granulated sugar and eggs. Then add the lemon juice and mix to combine (about 30 seconds). I like to use a medium sized whisk for this.Place bowl over the pot of boiling water. Cook the curd whisking occasionally for 7-10 minutes. You want the curd to be thick enough to coat the back of a spoon.
Once the curd is cooked, carefully remove the very hot bowl from the pot of boiling water and place on a heat safe mat (dish towel or oven mitt will do). Let the curd cool for a minute then strain through a fine mesh strainer. Straining the curd will prevent pieces of cooked egg and seeds from ending up in your finished curd.
Mix in the salt, butter, vanilla extract, and lemon zest. Mix until completely combined. Then cover with plastic wrap, making sure the plastic touches the top of the curd. This will prevent the curd from forming a skin. Allow the lemon curd to come to room temperature, then place in the refrigerator for at least 4 hours. The curd will continue to thicken as it cools.You can keep the lemon curd stored in an airtight container in the refrigerator for up to 5 days.
You can use the lemon curd as is, enjoy it with scones and madeleines. I like to mix fresh whipped cream into it and use it in cakes, fruit tarts, or in a gorgeous torte.
More information on this recipe:
Be sure to watch the full tutorial below.


